By: Jessica Patterson
WooCommerce is a flexible ecommerce platform for WordPress websites. Most Red Sunflower websites with an online store use WooCommerce. To create a user friendly shopping experience, it is important to make sure all product information is accurate and up to date. For this tutorial we’ll be adding a t-shirt that comes in multiple colors and sizes.
Step 1: Create an inventory list
Before you start adding products to your online store it’s important to know what products you have in stock and their prices. This is also a good time to take clear, well lit photos of your products and write detailed descriptions.
In this example, we have 30 t-shirts.
Example inventory list:
5 small yellow t-shirts, $25.00
5 medium yellow t-shirts, $25.00
5 large yellow t-shirts, $25.00
5 small red t-shirts, $35.00
5 medium red t-shirts, $35.00
5 large red t-shirts, $35.00
You can send this inventory list to your Red Sunflower Account Executive for fast, easy updates to your website.
Step 2: Identify product attributes
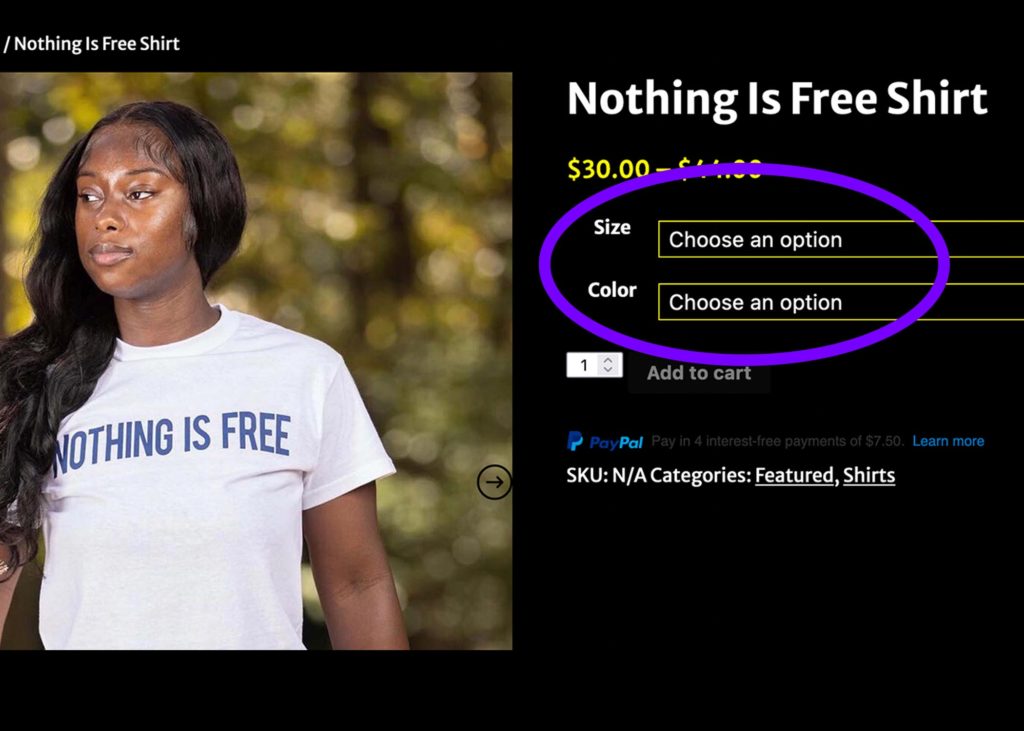
Product attributes describe your product options. On your website, product attributes will appear as drop-down options in your store. Take a look at your inventory list to identify your product attributes. Our example product comes in three sizes and two colors.
Example Product Attributes
Sizes: small, medium, and large
Colors: yellow and red
Step 3: Create Product
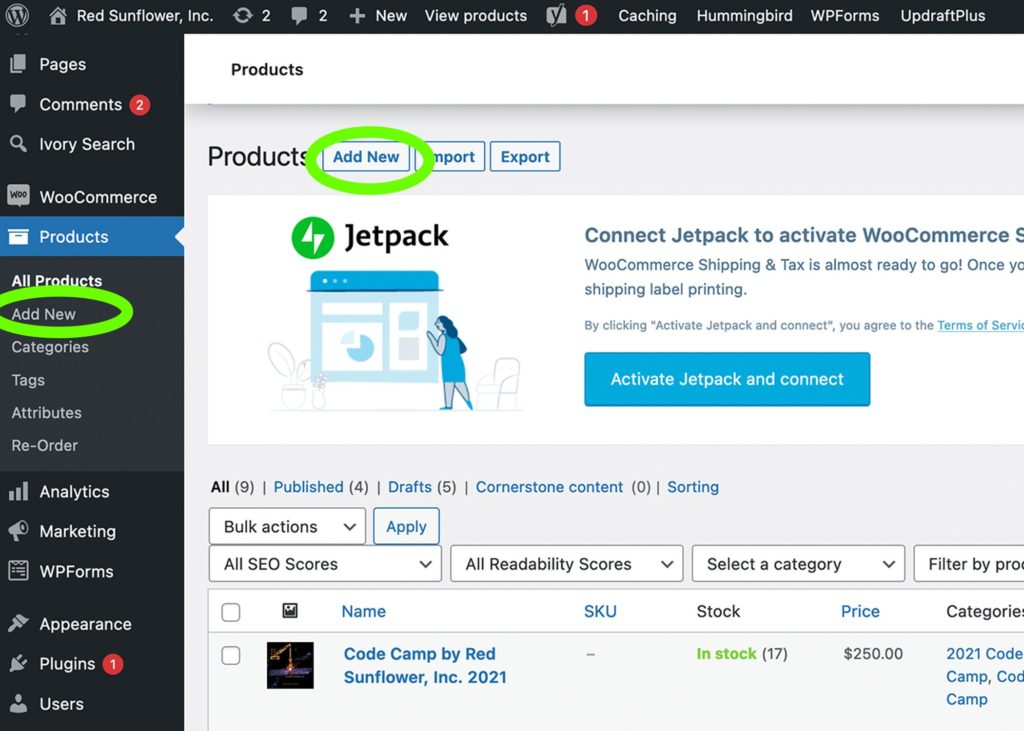
First, you’ll need to log into your WordPress Dashboard. Once you’re logged in, select Products from the menu on the left side of the screen. Then, select Add New.
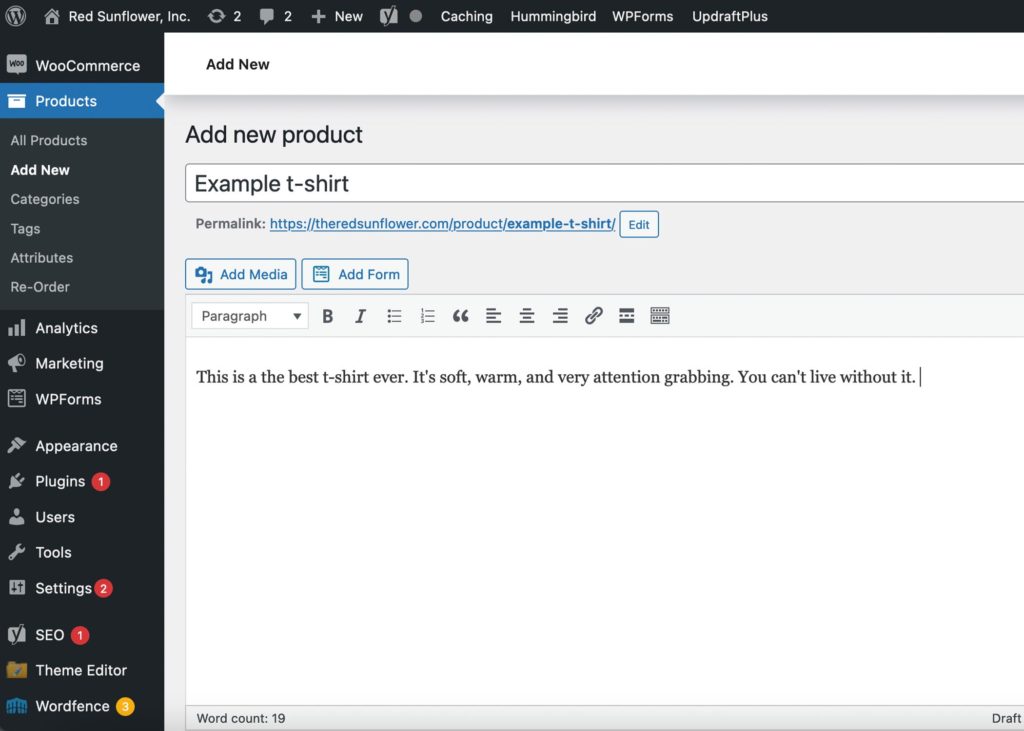
Add your Product name and description. You can also add a Featured Image or select Categories at this time.
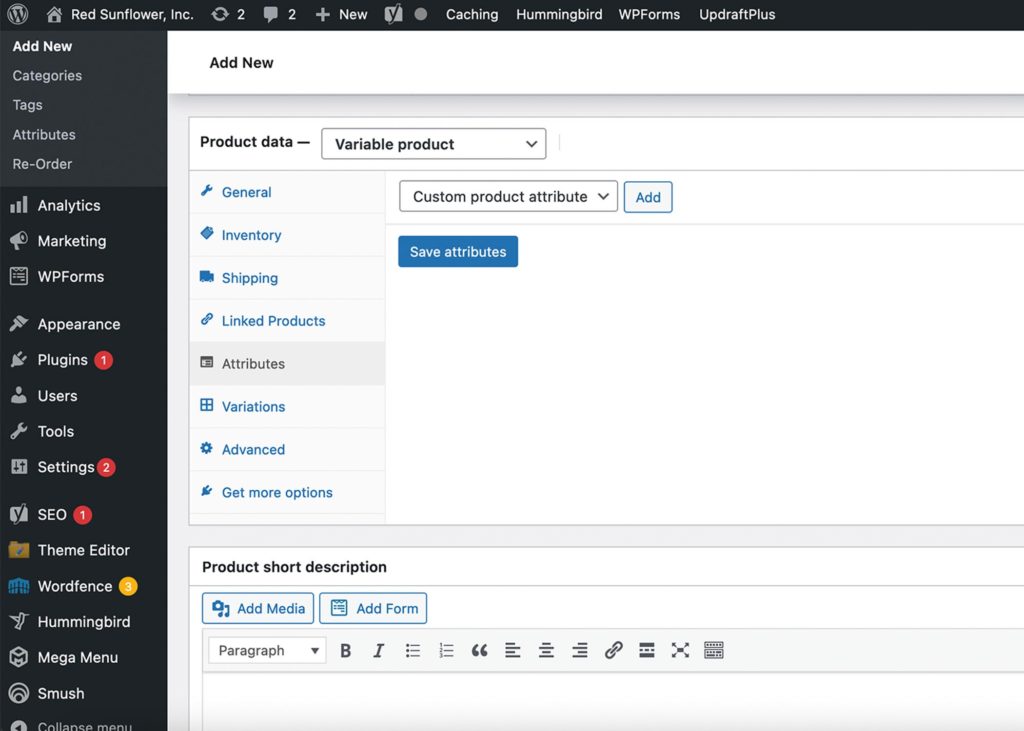
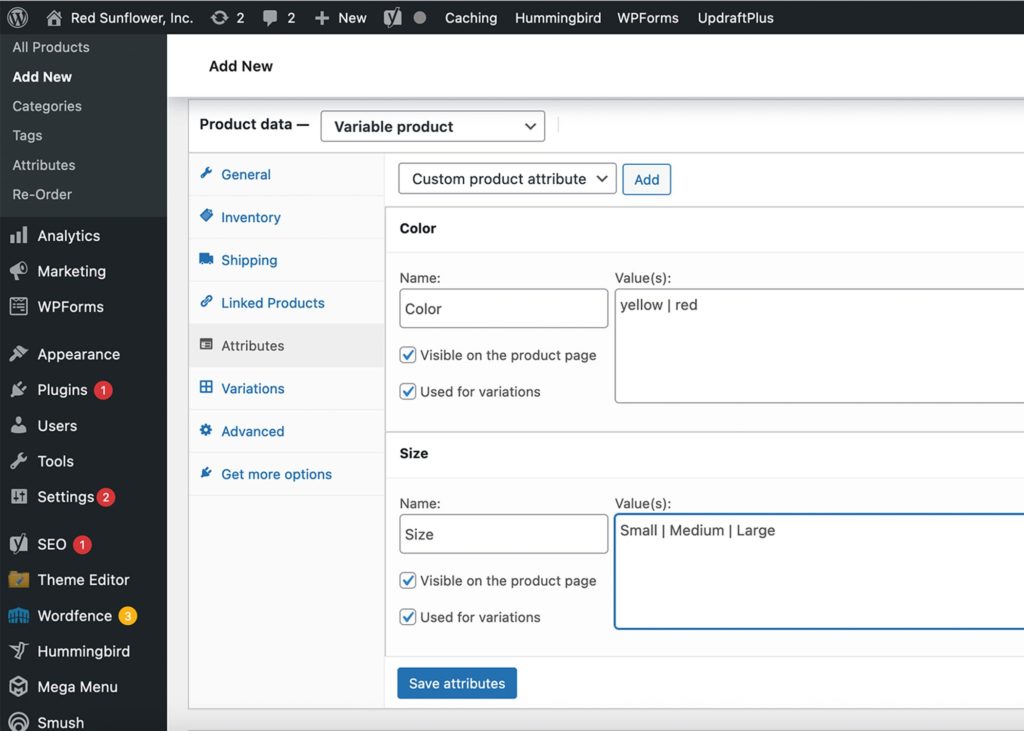
Scroll down to the Product data section. Next to the Product data section label there is a drop-down box. Make sure Variable product is selected. Then select Attributes from the menu. Make sure Custom product attribute is selected in the drop-down and click the Add button.
Enter the name and values for each attribute here. To get this information, refer back to the Product Attributes we listed in Step 2. Make sure the Used for variations box is checked. Don’t forget to press Save attributes when you are done.
Attribute 1:
Name: Color
Value(s): yellow | red
Attribute 2:
Name: Size
Value(s): small | medium | large
**Notice that each of the values is separated by the | symbol. You can find this symbol on your keyboard by pressing SHIFT + \
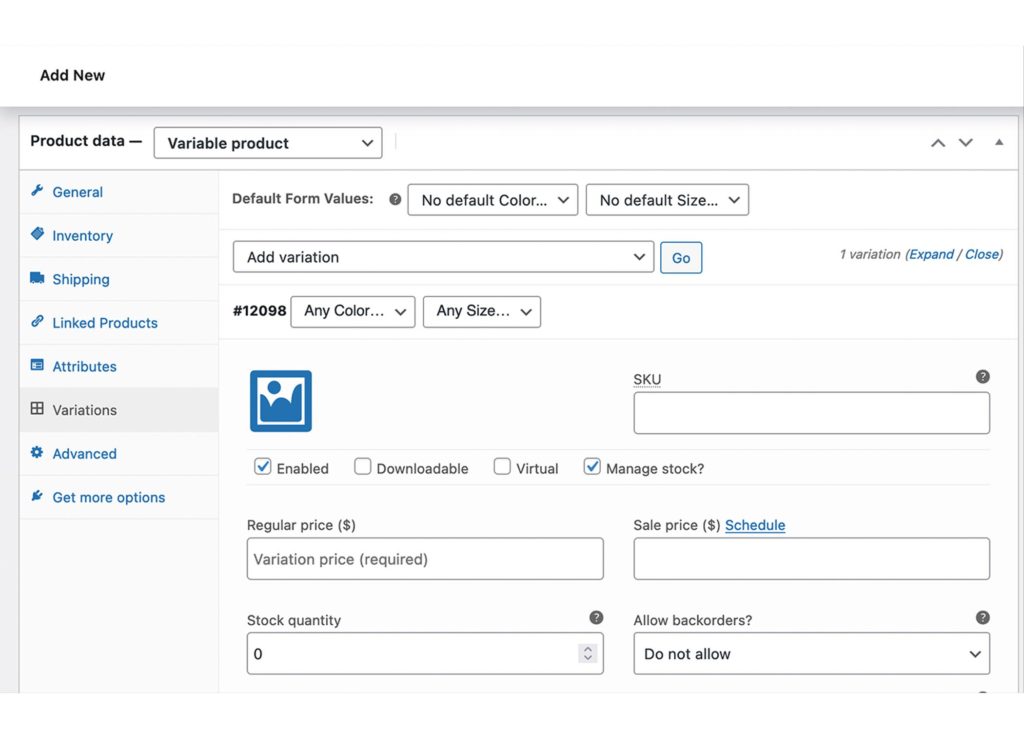
After you’ve saved your attributes, select Variations from the Product data menu. You’ll need to refer back to the Inventory List we created in Step 1 to complete this part.
Make sure Add variation is selected in the drop-down box and press Go.
A new variation will appear with drop-down options Any Color and Any Size. Click on the bold number next to the variation to see more options.
Here is our inventory list from Section 1:
- 5 small yellow t-shirts, $25.00
- 5 medium yellow t-shirts, $25.00
- 5 large yellow t-shirts, $25.00
- 5 small red t-shirts, $35.00
- 5 medium red t-shirts, $35.00
- 5 large red t-shirts, $35.00
Our first variation is for small yellow t-shirts. We have 5 of them and they cost $25.00 each. For the Any Color drop-down select yellow. For the Any Size drop-down select small. Add a Regular price of $25.00. Make sure Manage Stock? is checked. Add a Stock quantity of 5.
Add a variation for each item on your inventory list. Be sure to Save changes as you go.
Step 4: Publish
Look for the blue Publish or Update button to save all of your changes and update the store. For additional assistance updating your online store, contact your Red Sunflower
Leave a comment.