By: Jessica Patterson
Forms are a powerful and efficient way to collect information from your website visitors.
You could grow your email list with a simple subscribe form, accept messages with a contact form, or process applications using a longer, more detailed form. You can create custom contact forms using HTML, CSS, and JavaScript but it can be time consuming and it is not beginner friendly.
There are lots of WordPress plugins that help let you make simple forms. My favorite is Ninja forms.
Its drag and drop interface has lots of great options and it stores your form entries in a database by default. Storing your form entries in the database gives you the option to export your data and use it in other programs. In this tutorial we are going to make a simple customer satisfaction survey and add it to a page on our website.
For instructions on how to create a page on your WordPress website, click here.
First, we need to make sure that we have the Ninja Forms plugin on the website.
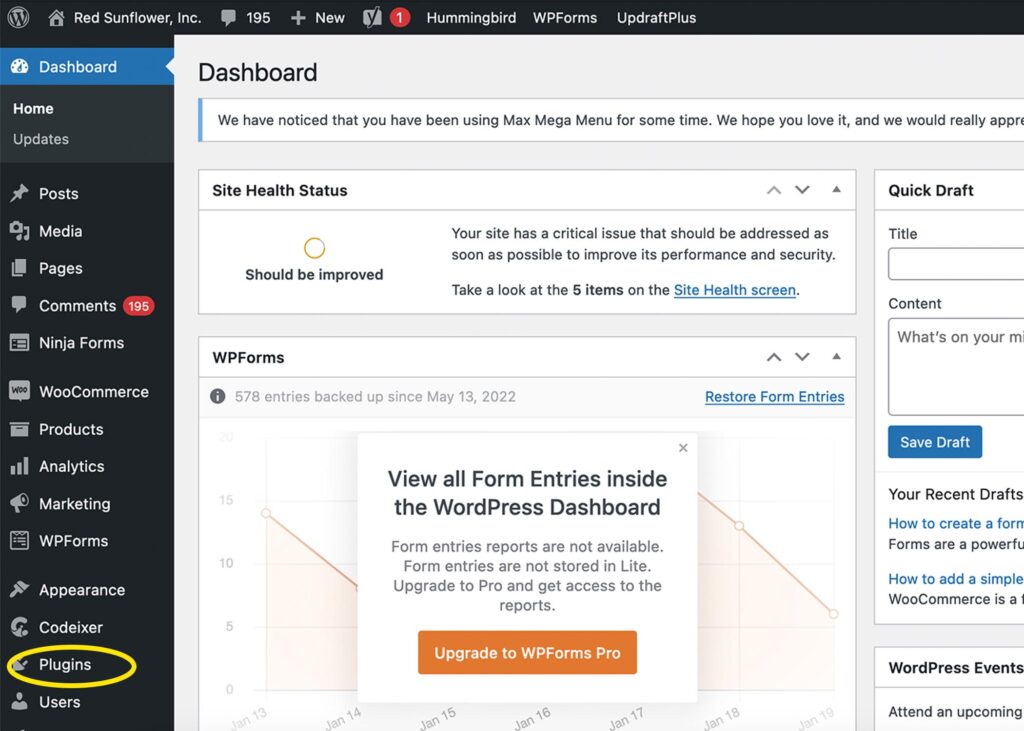
To get started, you will need to log into your WordPress Dashboard. Once you’re in the dashboard, look for the “plugins” button in the menu on the left side of your screen. It will probably be near the bottom of the list.
Once you’ve clicked on the plugins button, you will see a list of your plugins. If you have a Red Sunflower website, Ninja Forms may already be installed. If so, you’ll see it in your list of plugins.
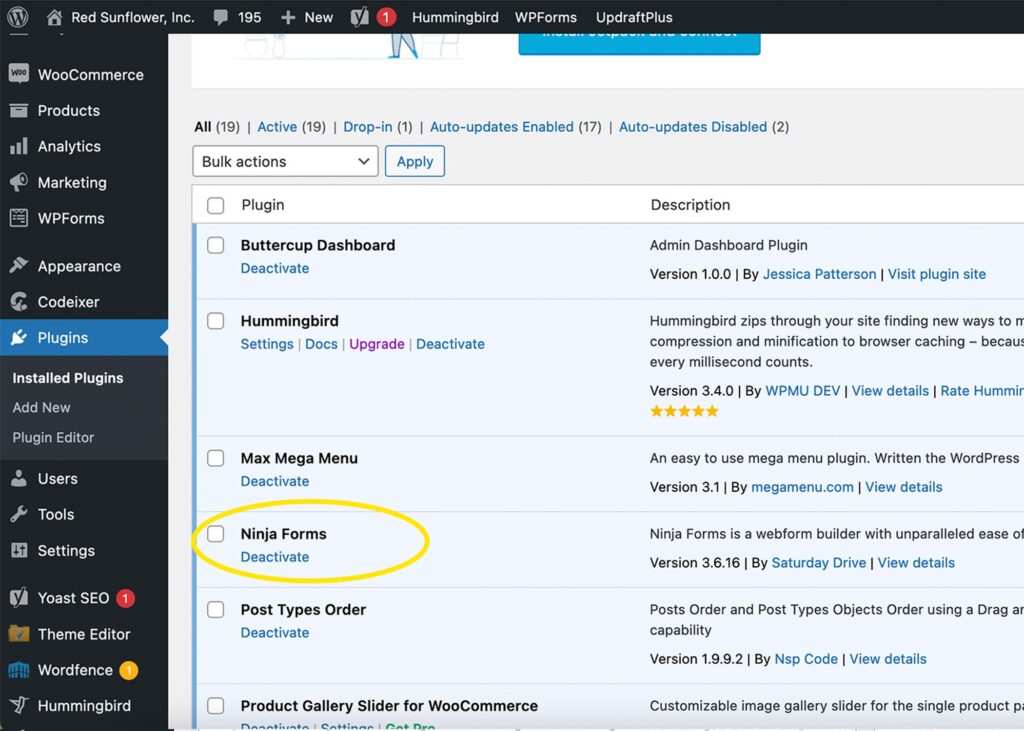
If you don’t see Ninja Forms in your list of plugins, you will need to install it.
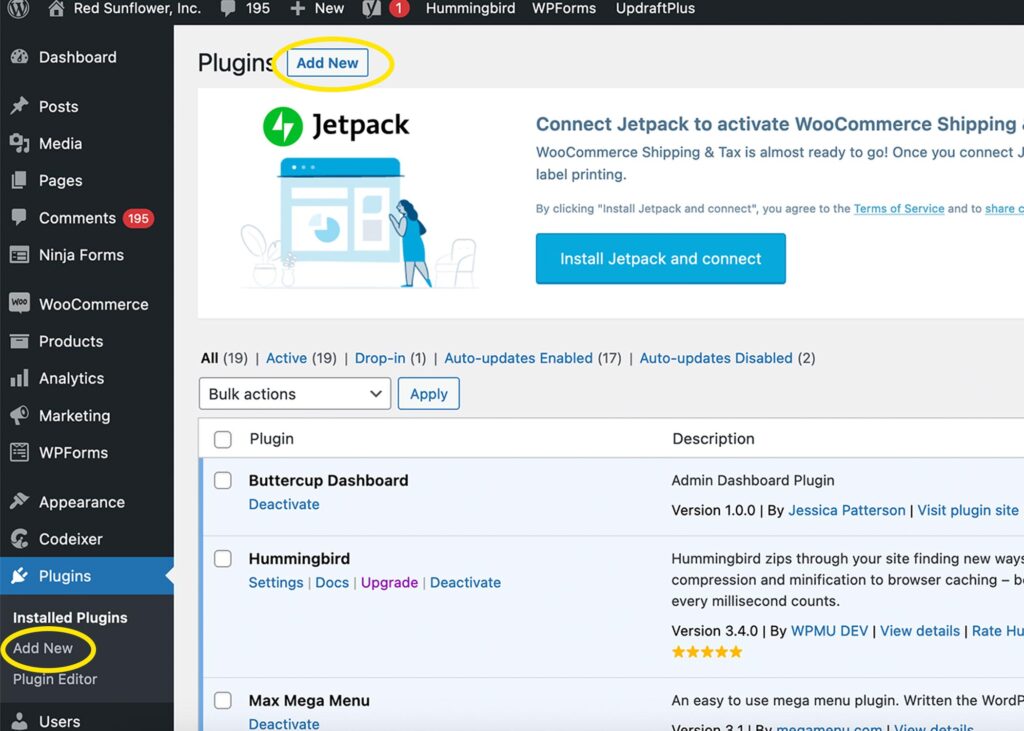
To install Ninja Forms, from the plugins page, click “Add New”. You will see a link under “Installed Plugins” in the menu on the left side. There is also an “Add New” button near the top of the page next to “Plugins”.
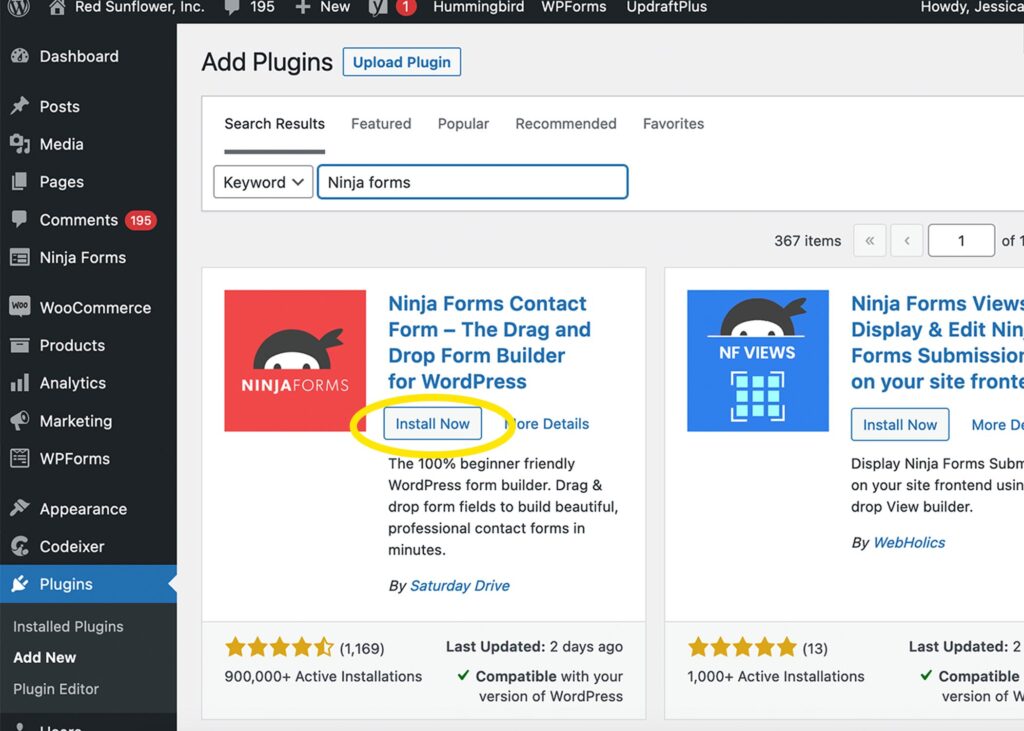
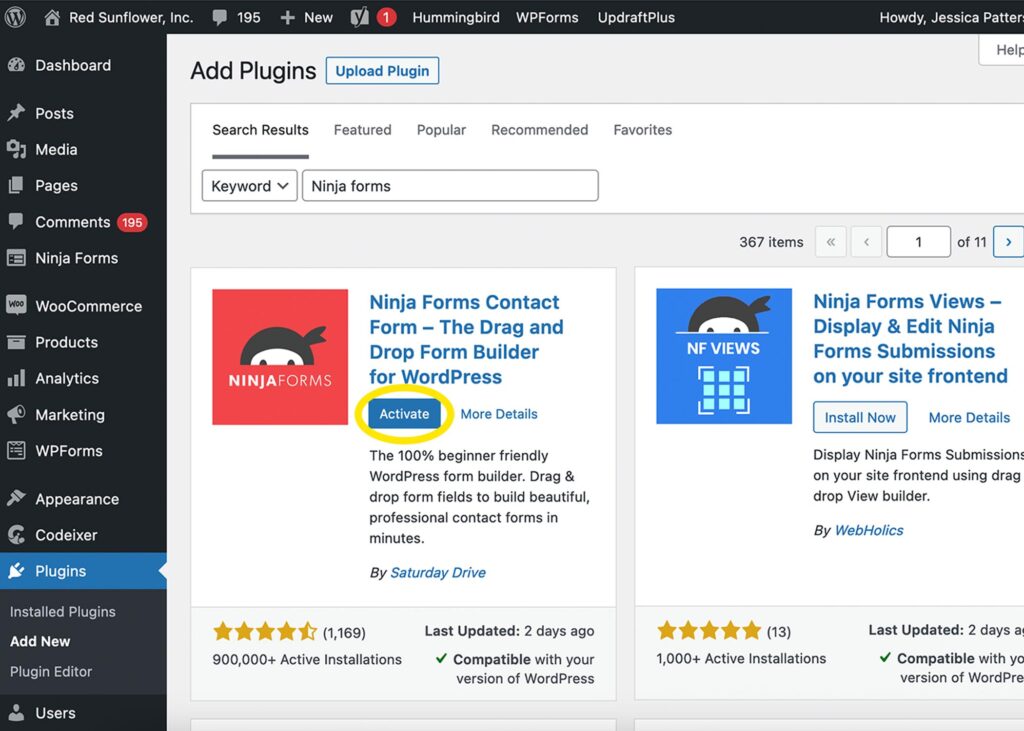
On the next screen you will see a list of available plugins. Look for the search bar that says “search plugins” and type Ninja Forms in that box. Once the search results come back the first option should say Ninja Forms Contact Form- The Drag and Drop Form Builder for WordPress. Click the Install Now button. After the plugin is installed, click Activate.
Now that you have Ninja Forms installed, it’s time to make our form.
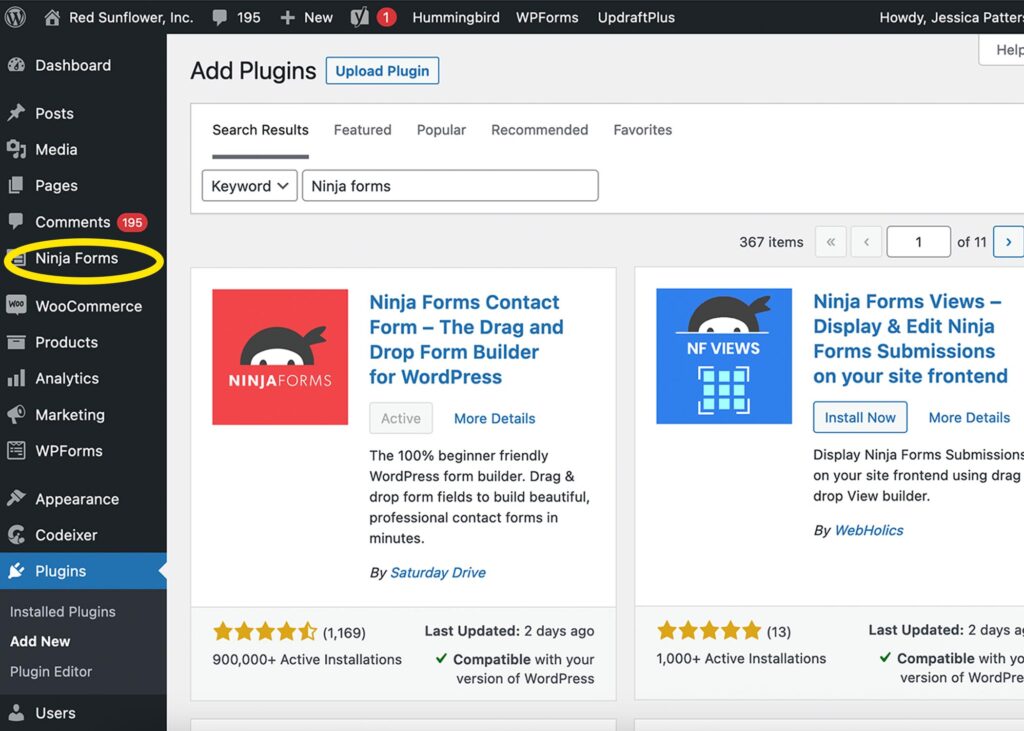
Find Ninja Forms in the menu on the left side of the screen and click on it.
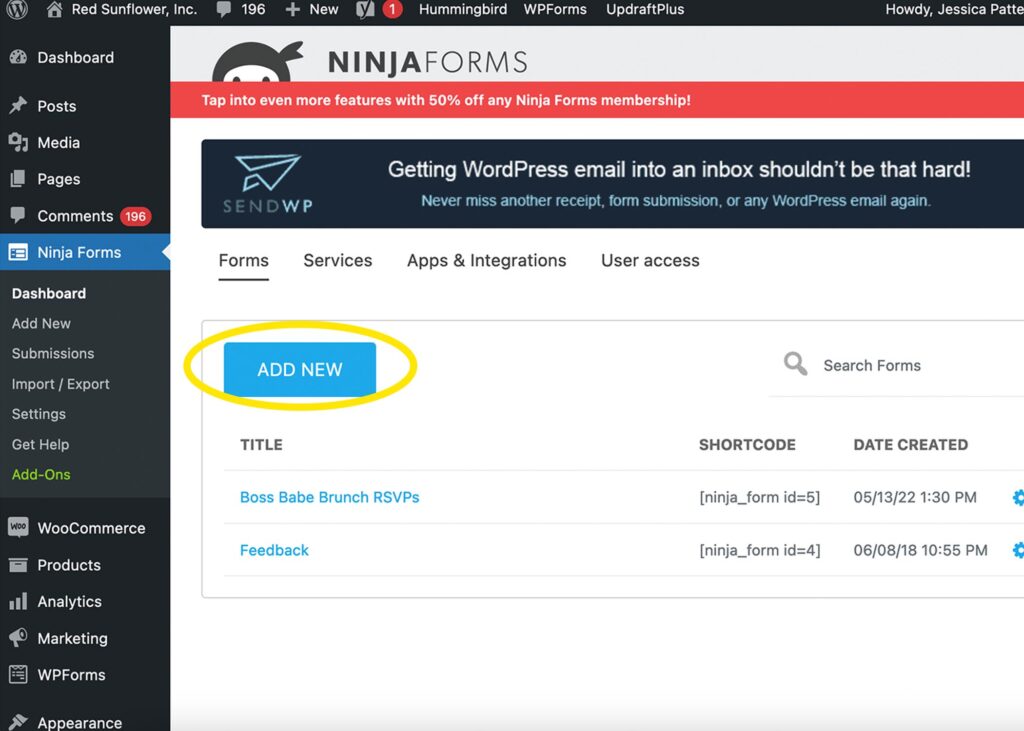
Next, you’ll see a screen that lists all the available forms. We are creating a new form, so click the big “Add New” button.
The next screen will prompt you with some templates to help you get started. For this tutorial we are creating a survey so I am going to start with the “Collect Feedback” template. You can choose any template you want or choose “Blank Form” if you want to start from scratch.

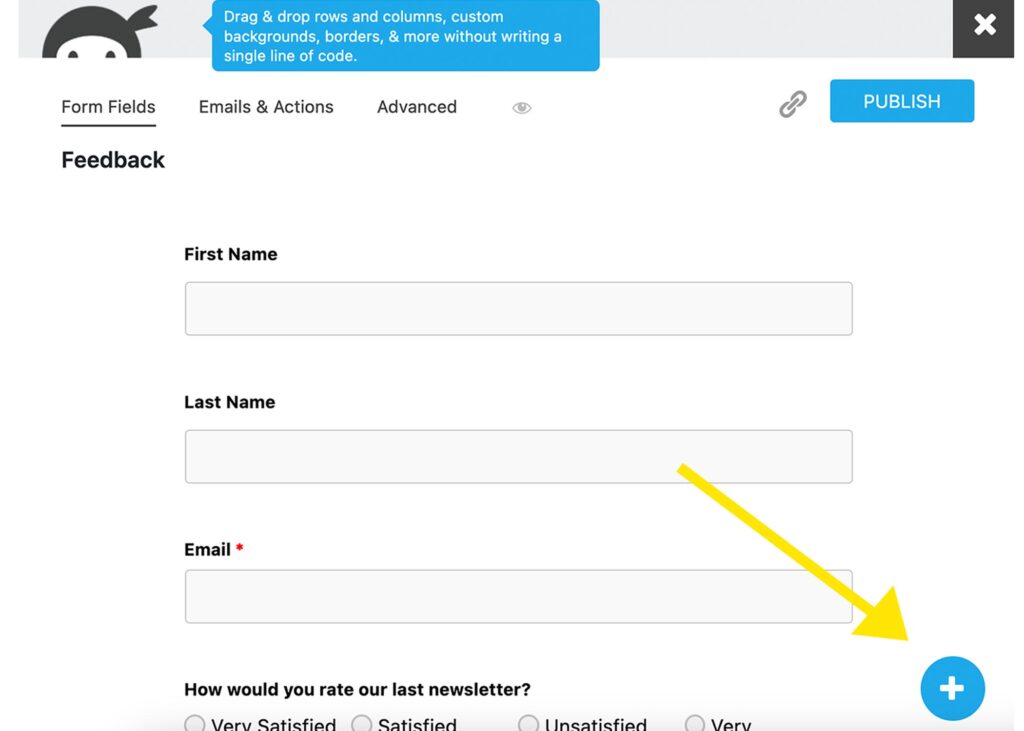
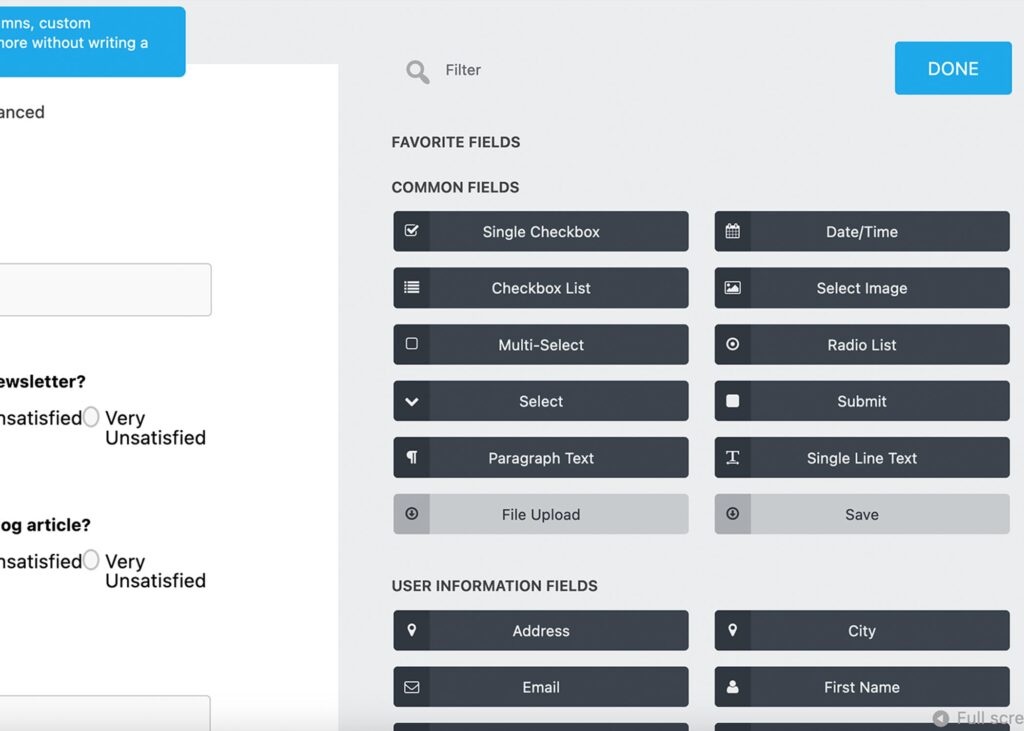
Because I selected a template some form fields were automatically created for me. To create a new form field, click the blue circle with a white plus sign inside. It will be near the bottom right side of the screen.
When you click the plus sign you will see some field options. I want to add a question that asks for the user’s domain name. So I will select “single line text” from the list of options. Generally, if you don’t see an option that fits your question you will want to select “single line text” for short answers and “paragraph text” for longer answers. When you click the the field type you want it will seem like nothing happened. This is normal. To see your new field, press “Done” in the top right corner and scroll to the bottom of your form. You should see your newly created field.
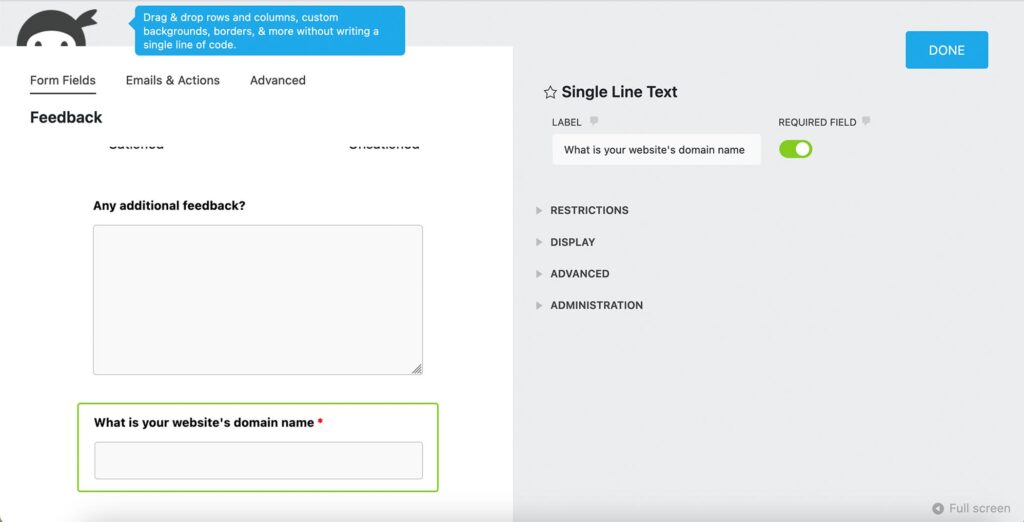
To customize your newly created form field, click on it so that it is highlighted in green. To change the name of that form field from “single line text” to your question, update the Label field in the box on the right side of the screen. You can toggle the “Required Field” to on if you want to force users provide an answer to that question. When you’re done editing the field, click the blue DONE button in the top right corner. You can drag and drop the fields to change their order.
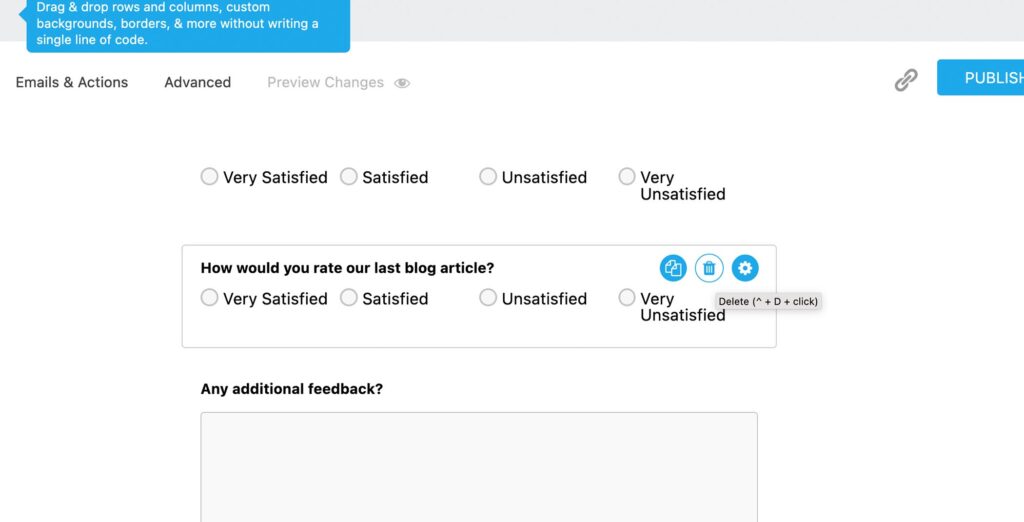
To DELETE a field (it’s tricky) HOVER your mouse over the field you want to delete. DON’T CLICK ON IT. You’ll see a gear icon show up on the right side of the field. HOVER your mouse over the gear button (no clicking) and a trash can icon will appear. Click the trash can icon to delete that field. If the field is highlighted in green that means it is active and these instructions won’t work. You’ll need to click into a different field or press the blue “done” button and try again.
If you want to know what happens when someone completes your form, click on the “Advanced” tab near the top of the screen. It will show you all of the actions that take place when the form is submitted. You may want to click on the “Admin Notification Email” option and double check that it will email you the form results to the correct email address.
When you’re done creating your form hit the PUBLISH button in the top right corner of the screen. After you’ve published the changes to your form, click the X in the gray box in the top right corner of your screen to return to the WordPress Dashboard.
Once you have your form done we need to add it to a page so that it can be displayed on your website.
You can add forms to blog posts or pages and the process is similar. For a detailed tutorial on how to create a blog post click here. For a detailed tutorial on how to create a page click here.
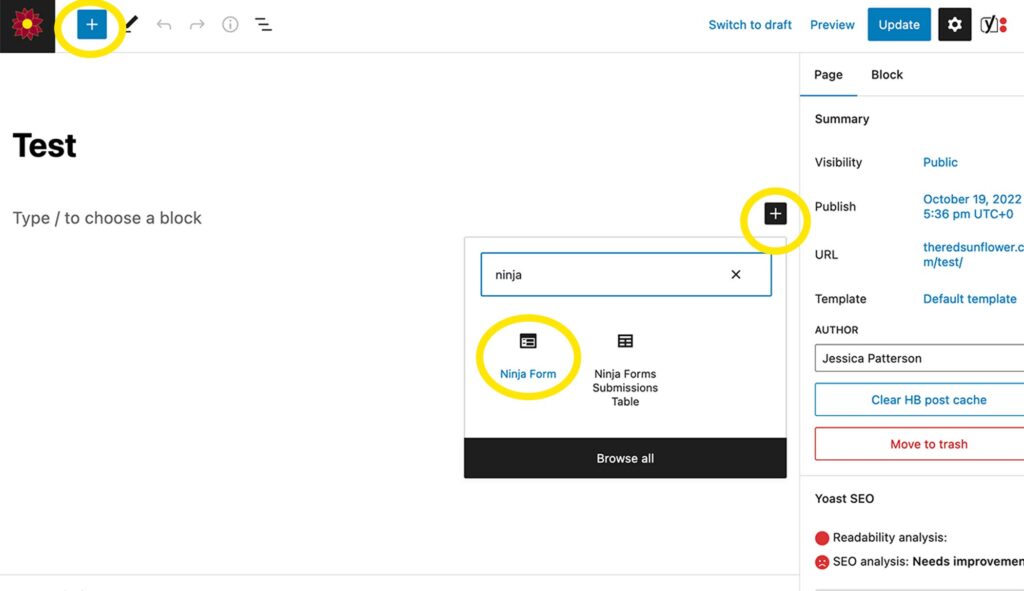
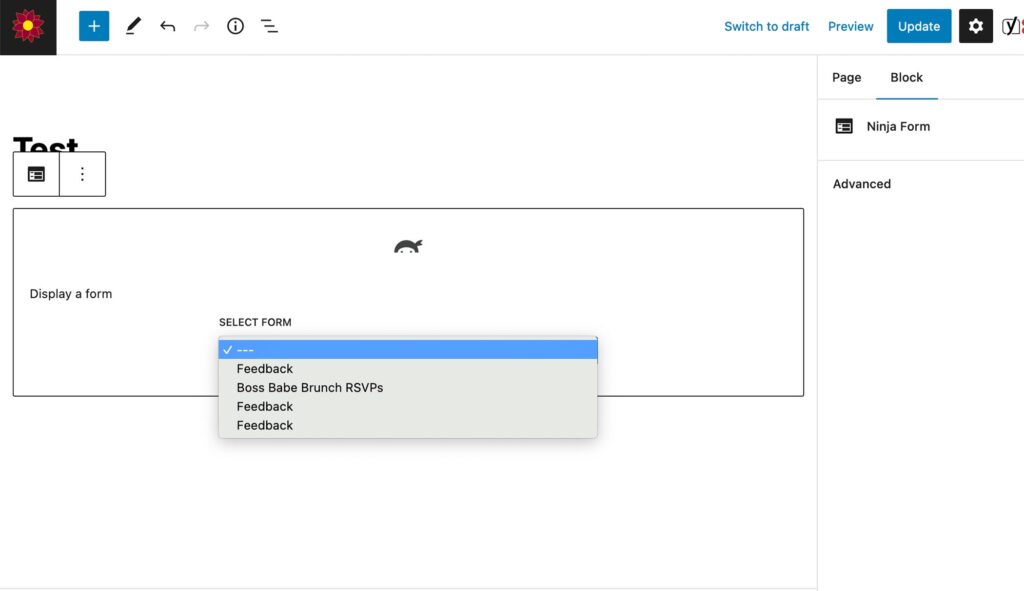
From the WordPress dashboard, click into the post or page you want to add the form to so that you can edit it. Click the box with the plus sign in it and type “ninja form” into the search bar. Select the first option.
Then, select the form you want to display. It will show you a preview of the form once selected.
If everything looks good, hit the blue Publish or Update button in the top right corner of the screen. The page or post will be updated with your form.
That was a lot of work!
If you were able to get your form working, pat yourself on the back. You are well on your way to becoming a WordPress wizard! If this tutorial went over your head, no worries! Contact us and we’ll be glad to help you create the perfect website.
Leave a comment.